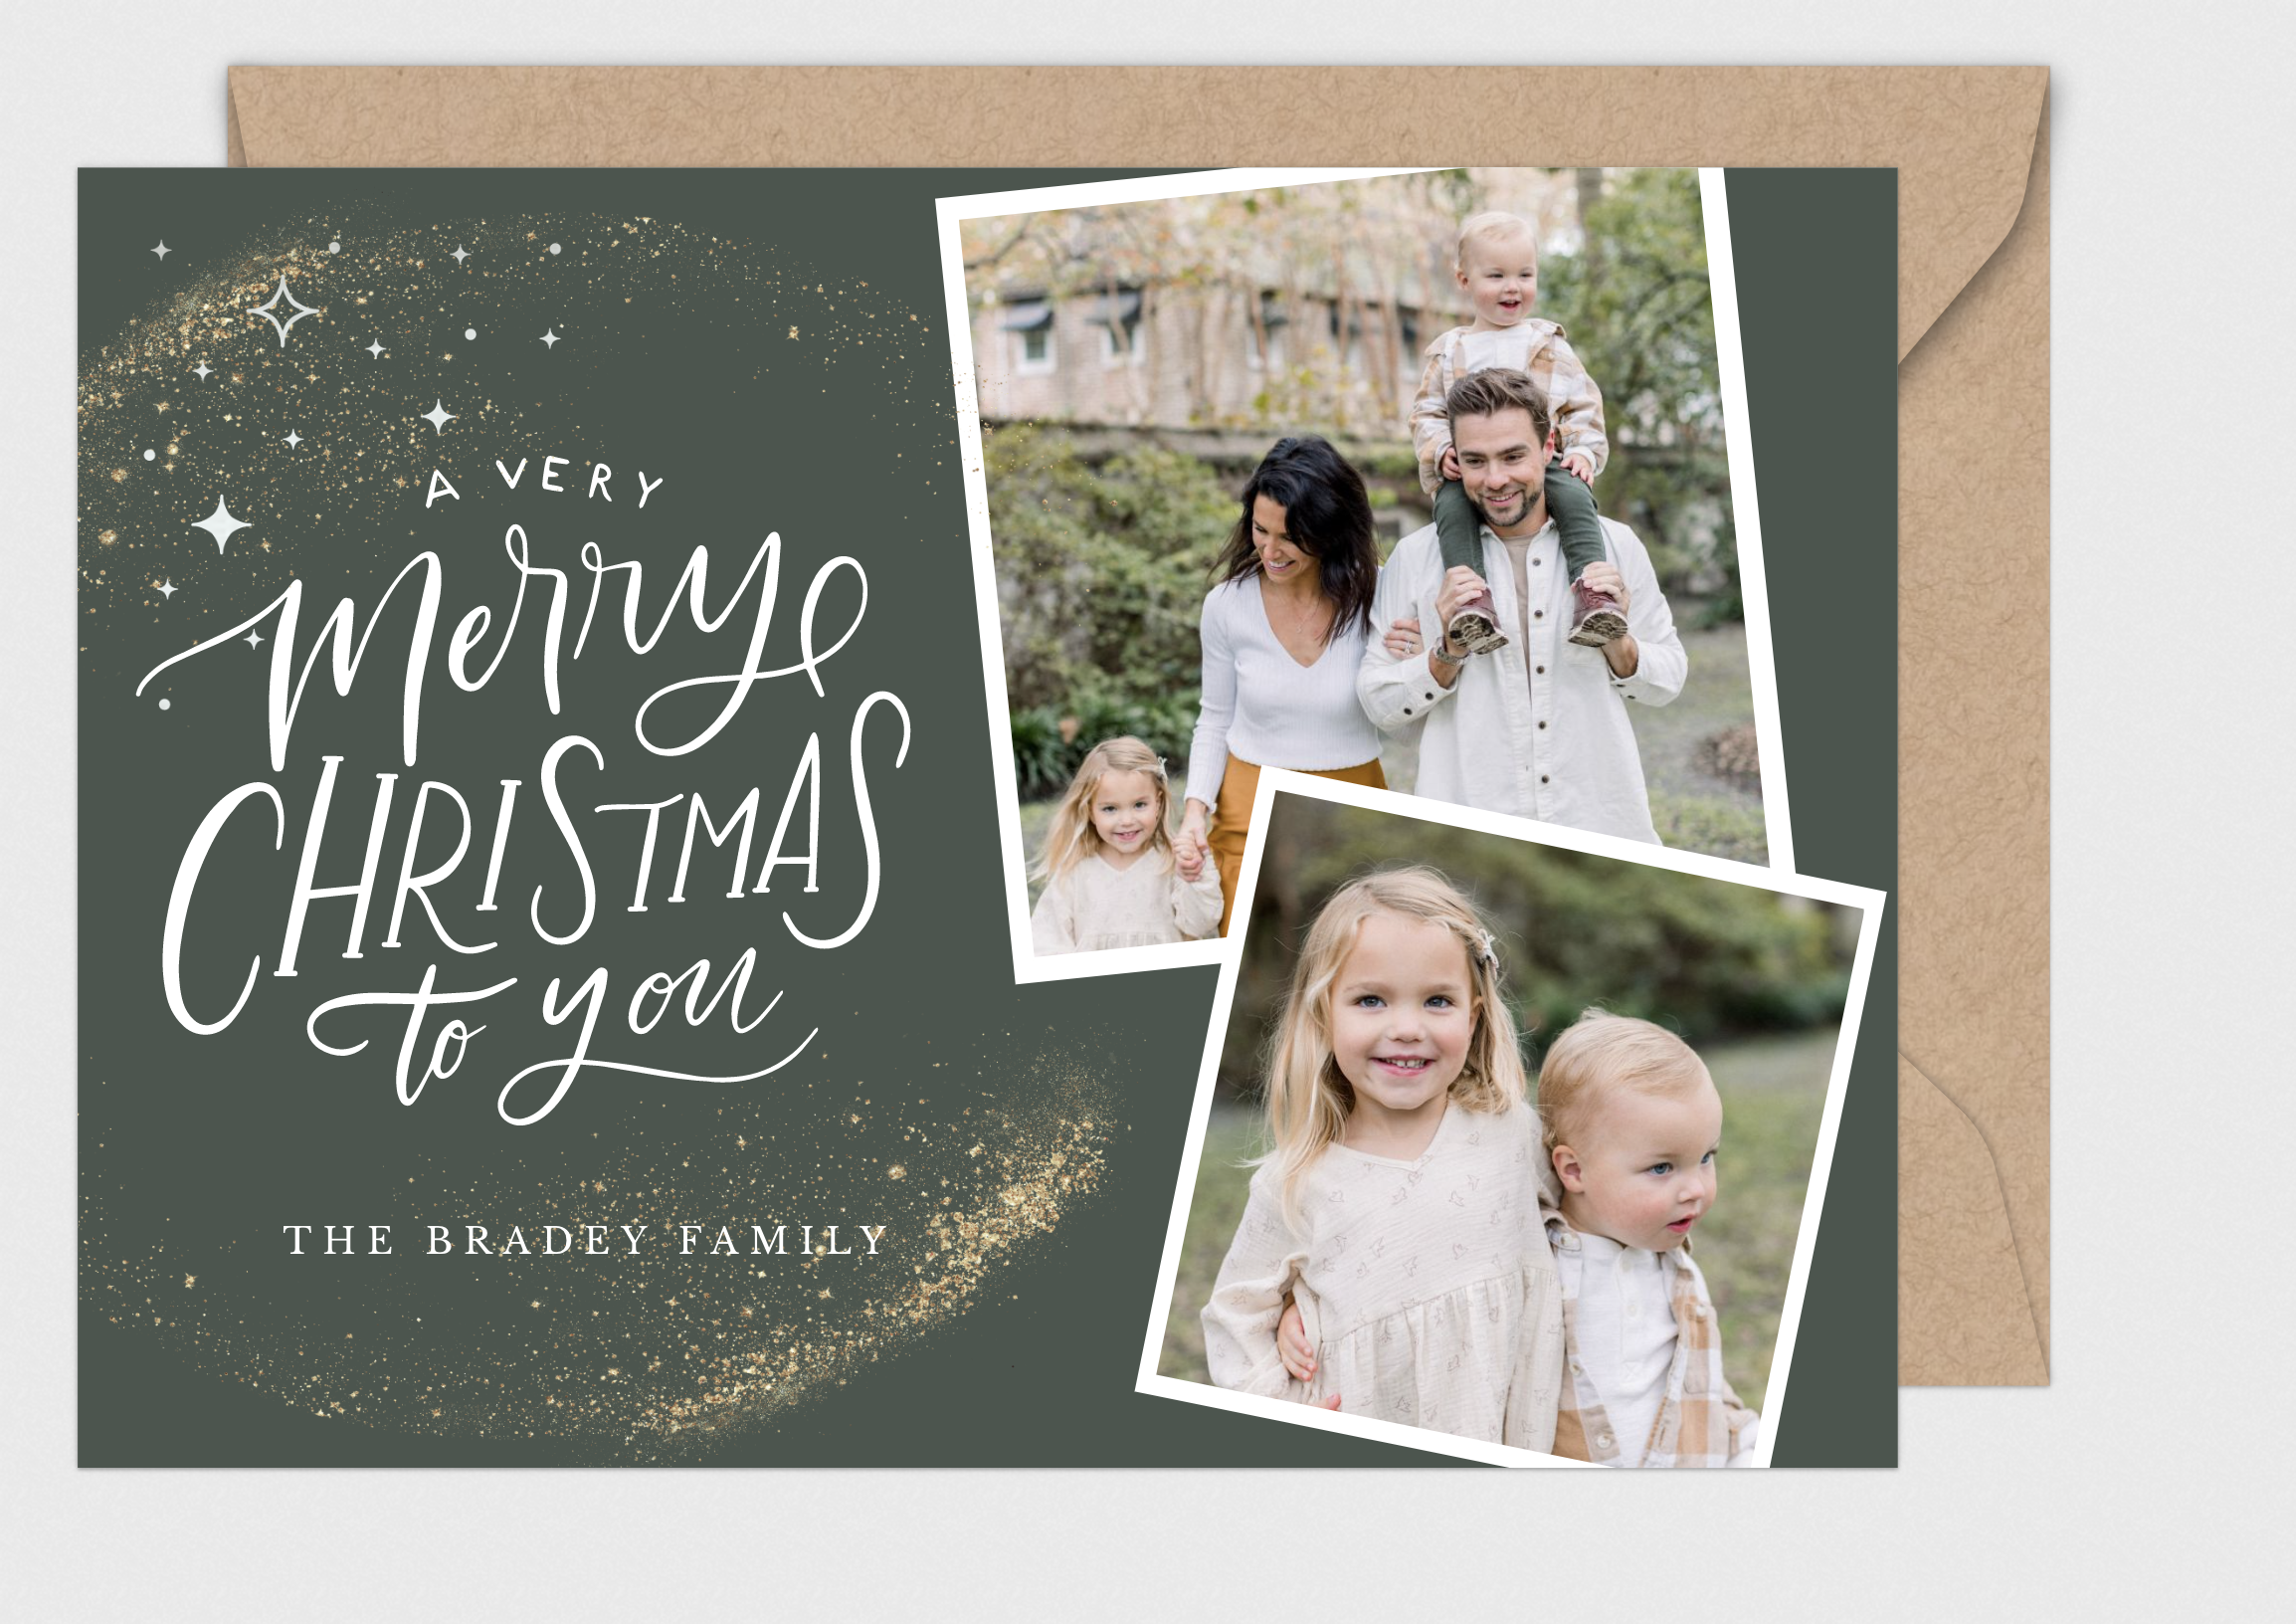
One of my favorite ways to share photos with loved ones is by sending holiday cards! It’s always so much fun creating these because there are SO many ways to customize the design, right from your gallery! If you’ve had a wedding, mini-session, engagement session…or any other type of session for that matter, you can create holiday cards with these steps!
Open Up Your Photo Gallery
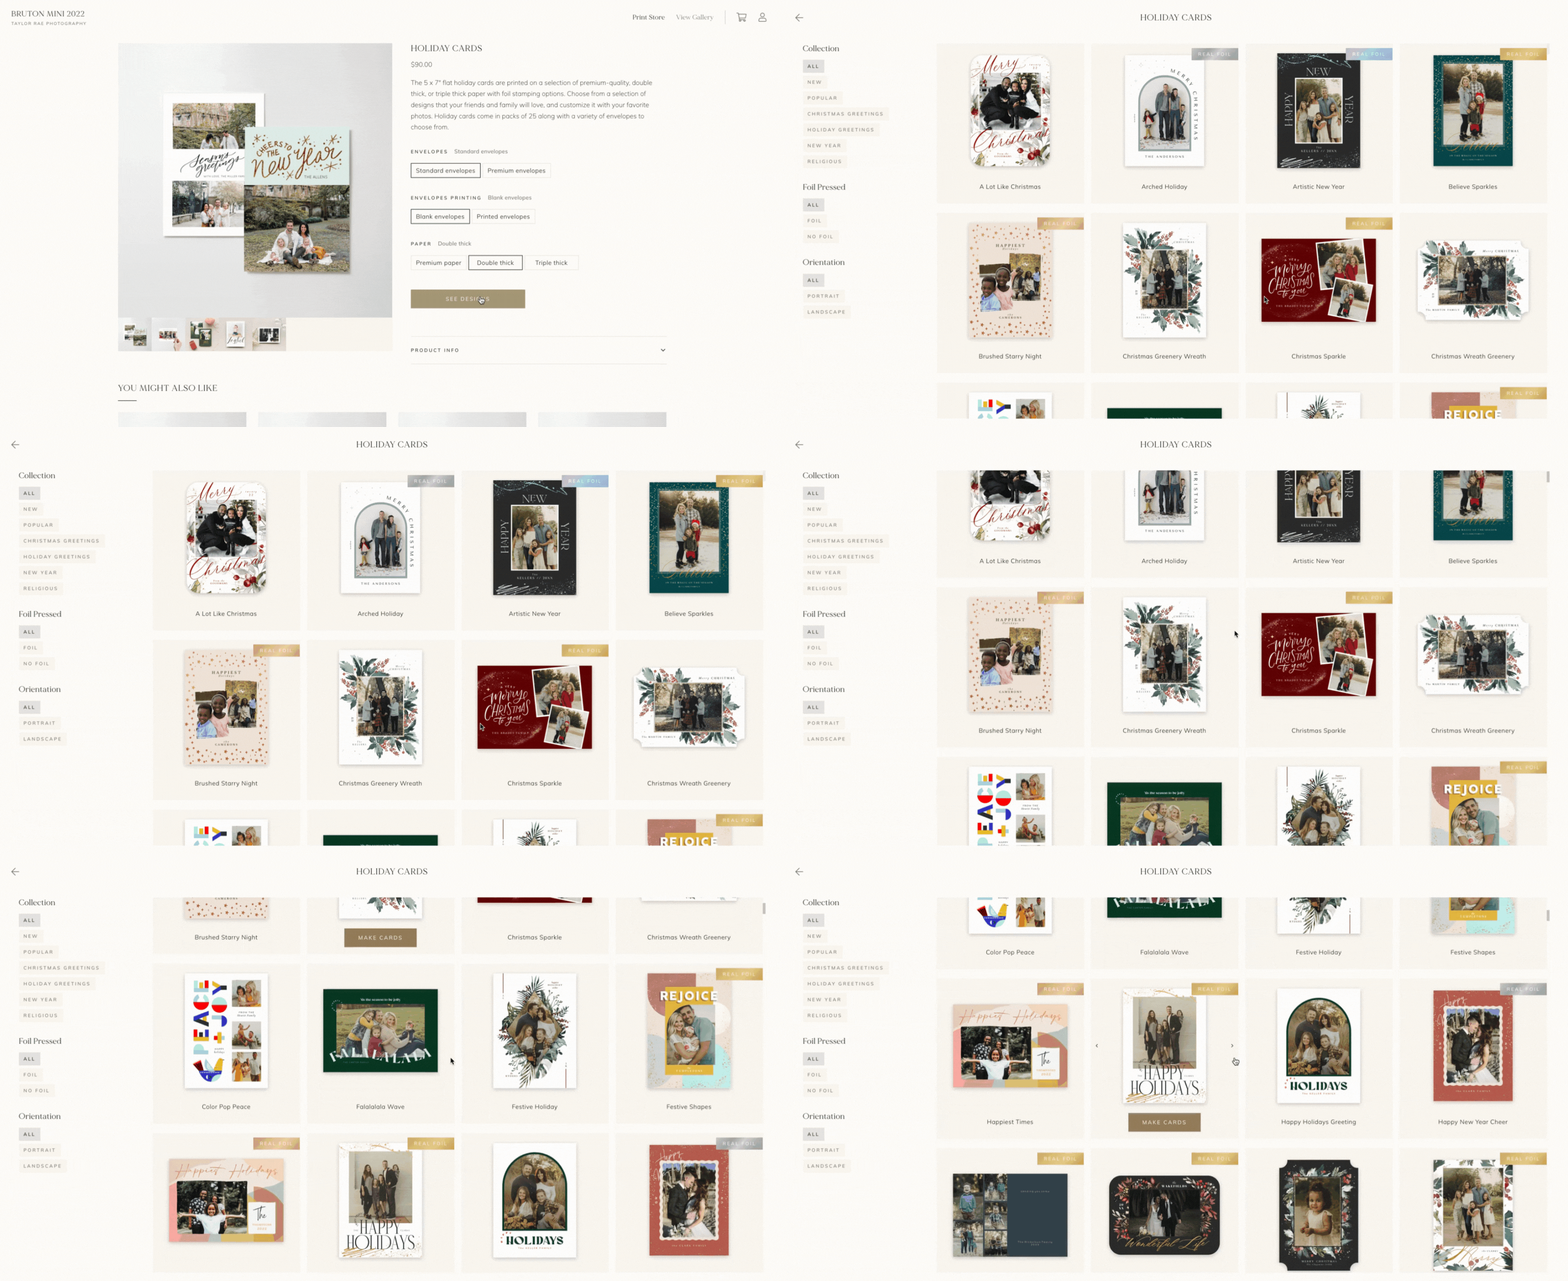
If you received a gallery link from me, just open your gallery and select the photo you’d like to use for your cards, then press that shopping bag icon! You’ll then be able to choose between prints, wall art, and cards. When you select cards, you’ll find “Holiday Cards” at the top!
Once you click on Holiday Cards, you’ll be able to select your preferred envelope options and paper quality. Then click “SEE DESIGNS” to start scrolling through holiday card designs. Select your favorite design to start customizing!
Create Your Own Holiday Cards
Depending on the design you select, you’ll be able to customize the color of the card, how many photos to include on the front (and back), as well as foil options!
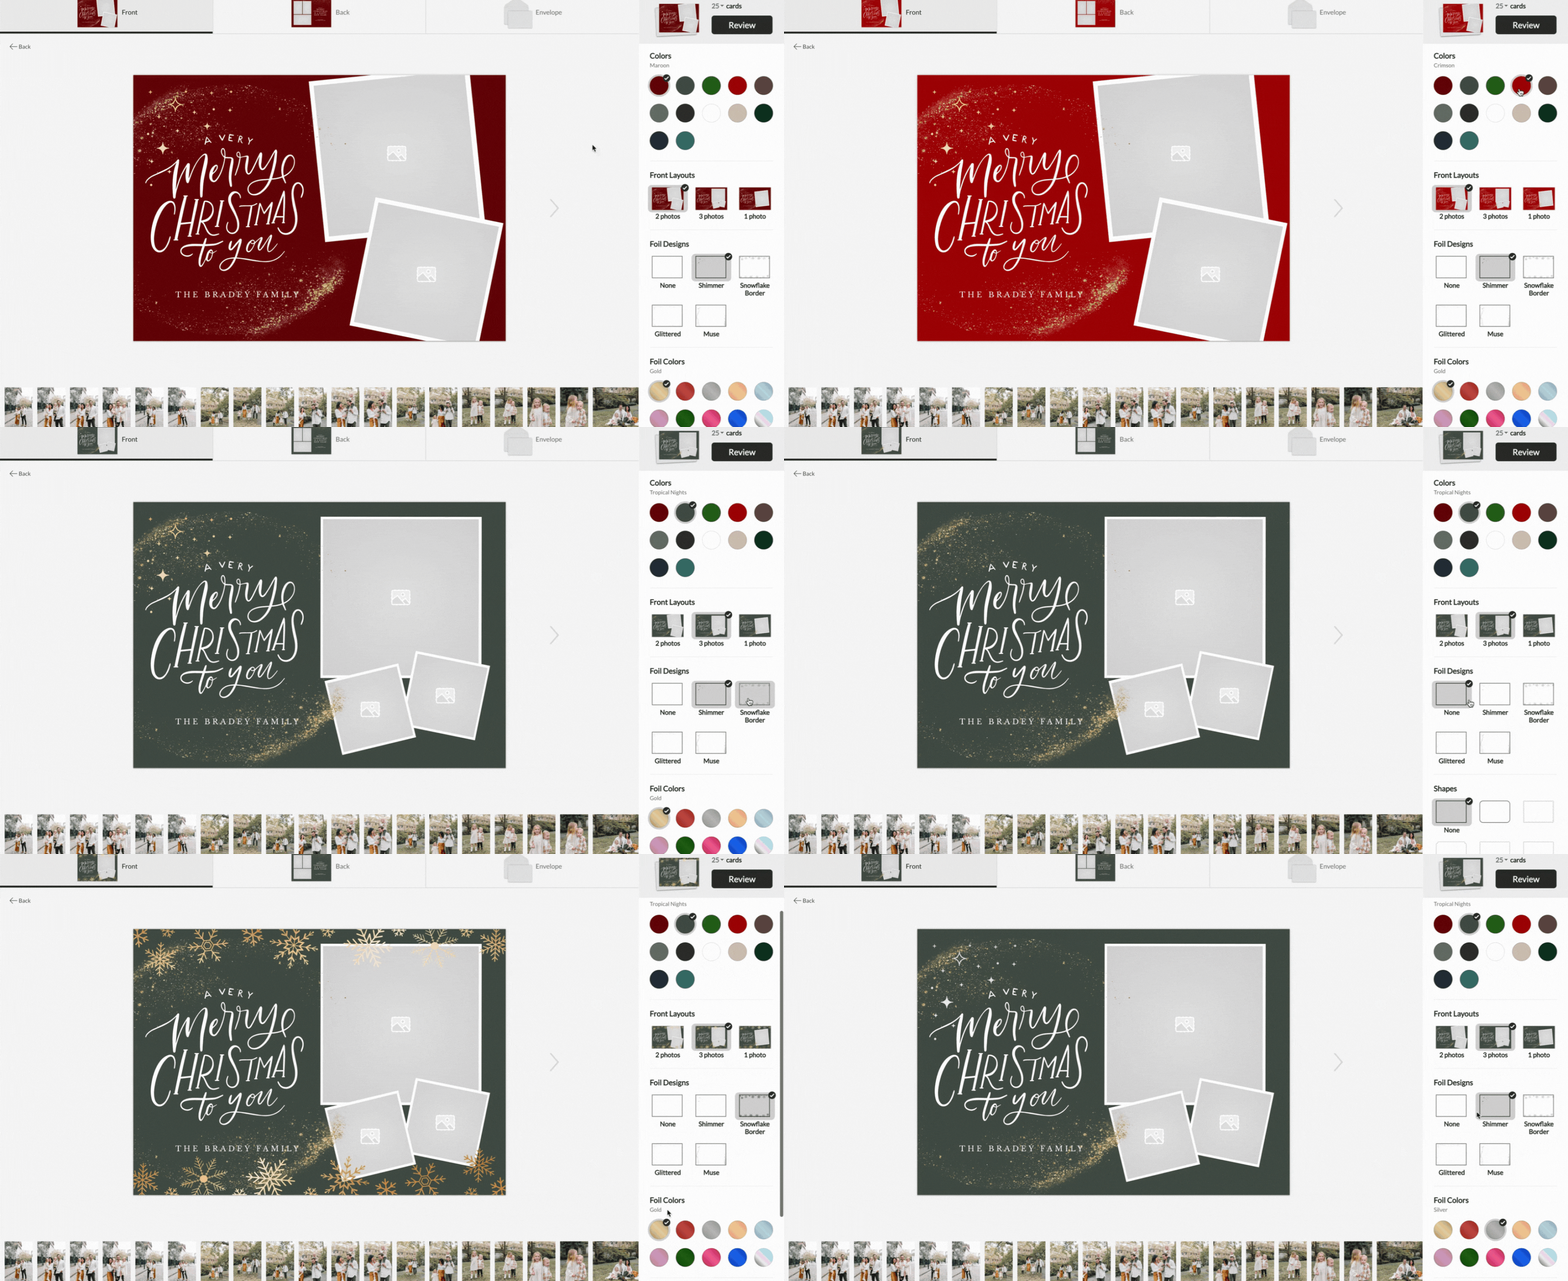
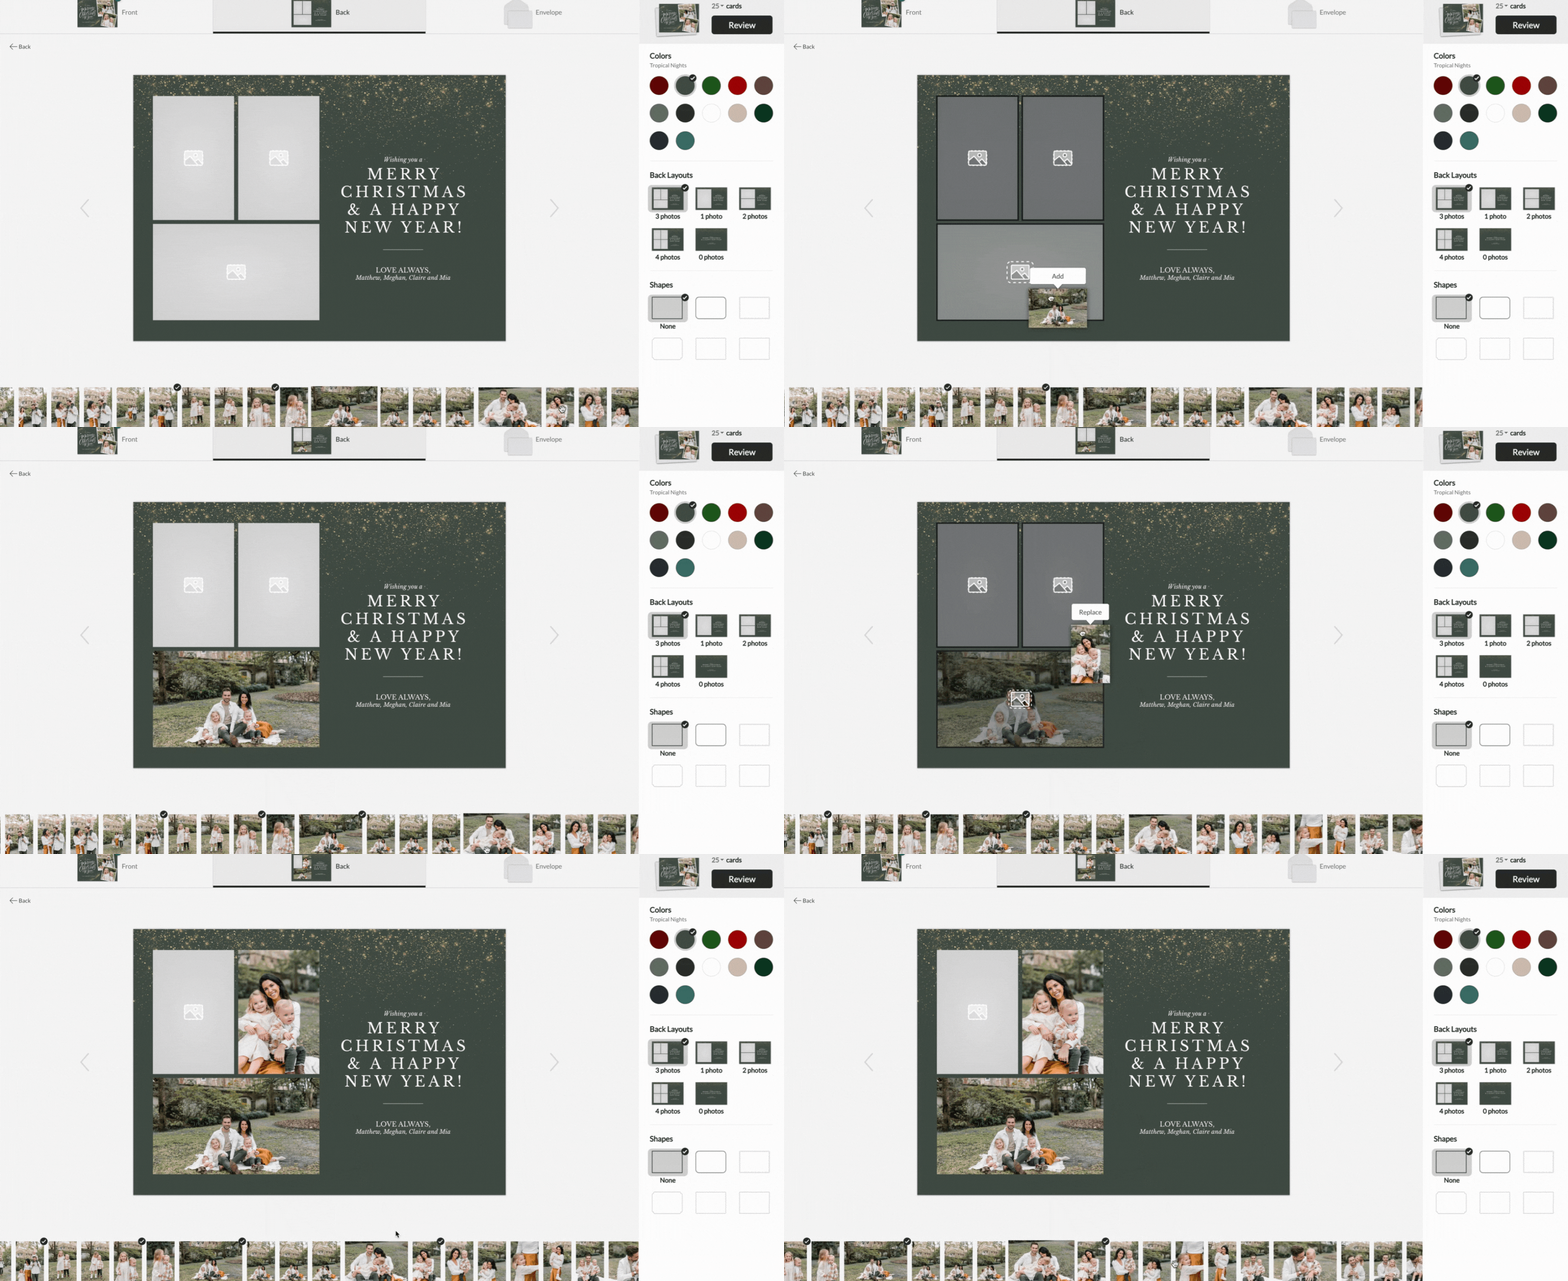
When you’re happy with the design, you can start dragging and dropping your photos that are in your gallery into the actual holiday card design!
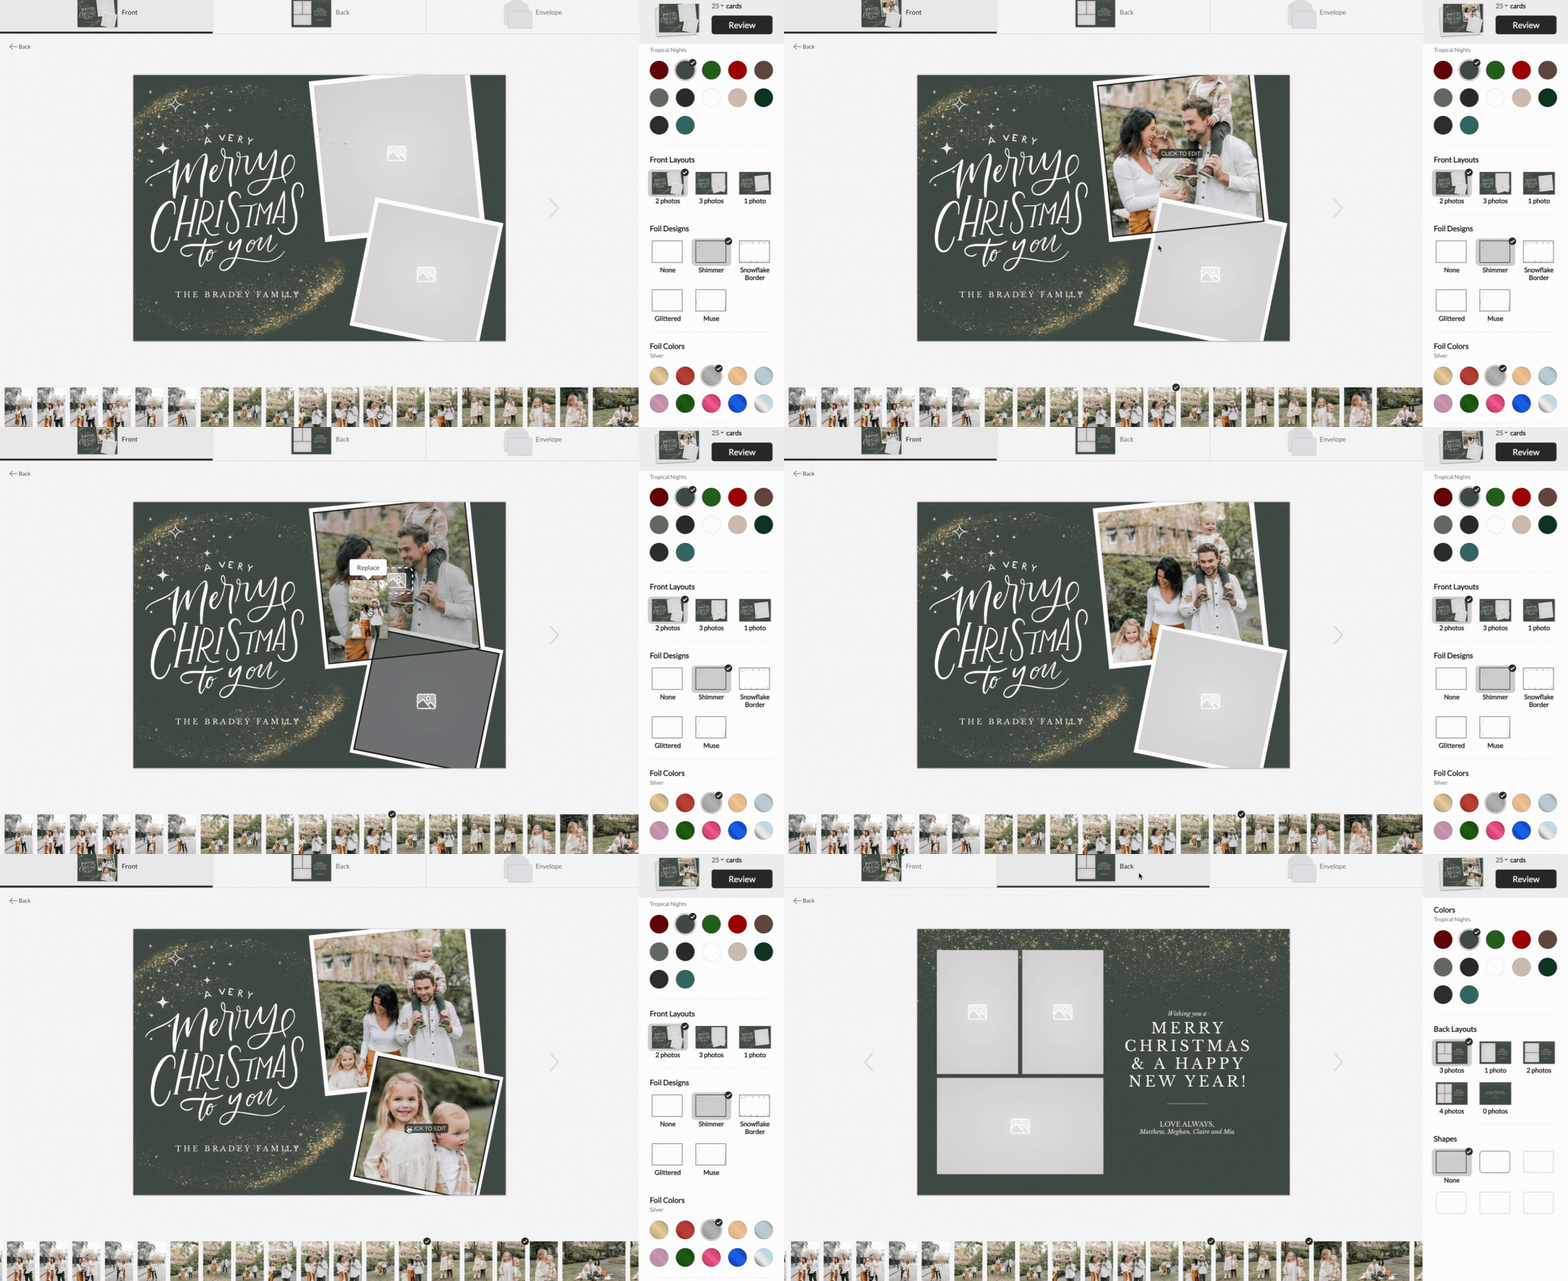
Some card designs will allow you to also customize the back of the card! This is another opportunity to share more photos from your session!
Preview Your Holiday Card Design
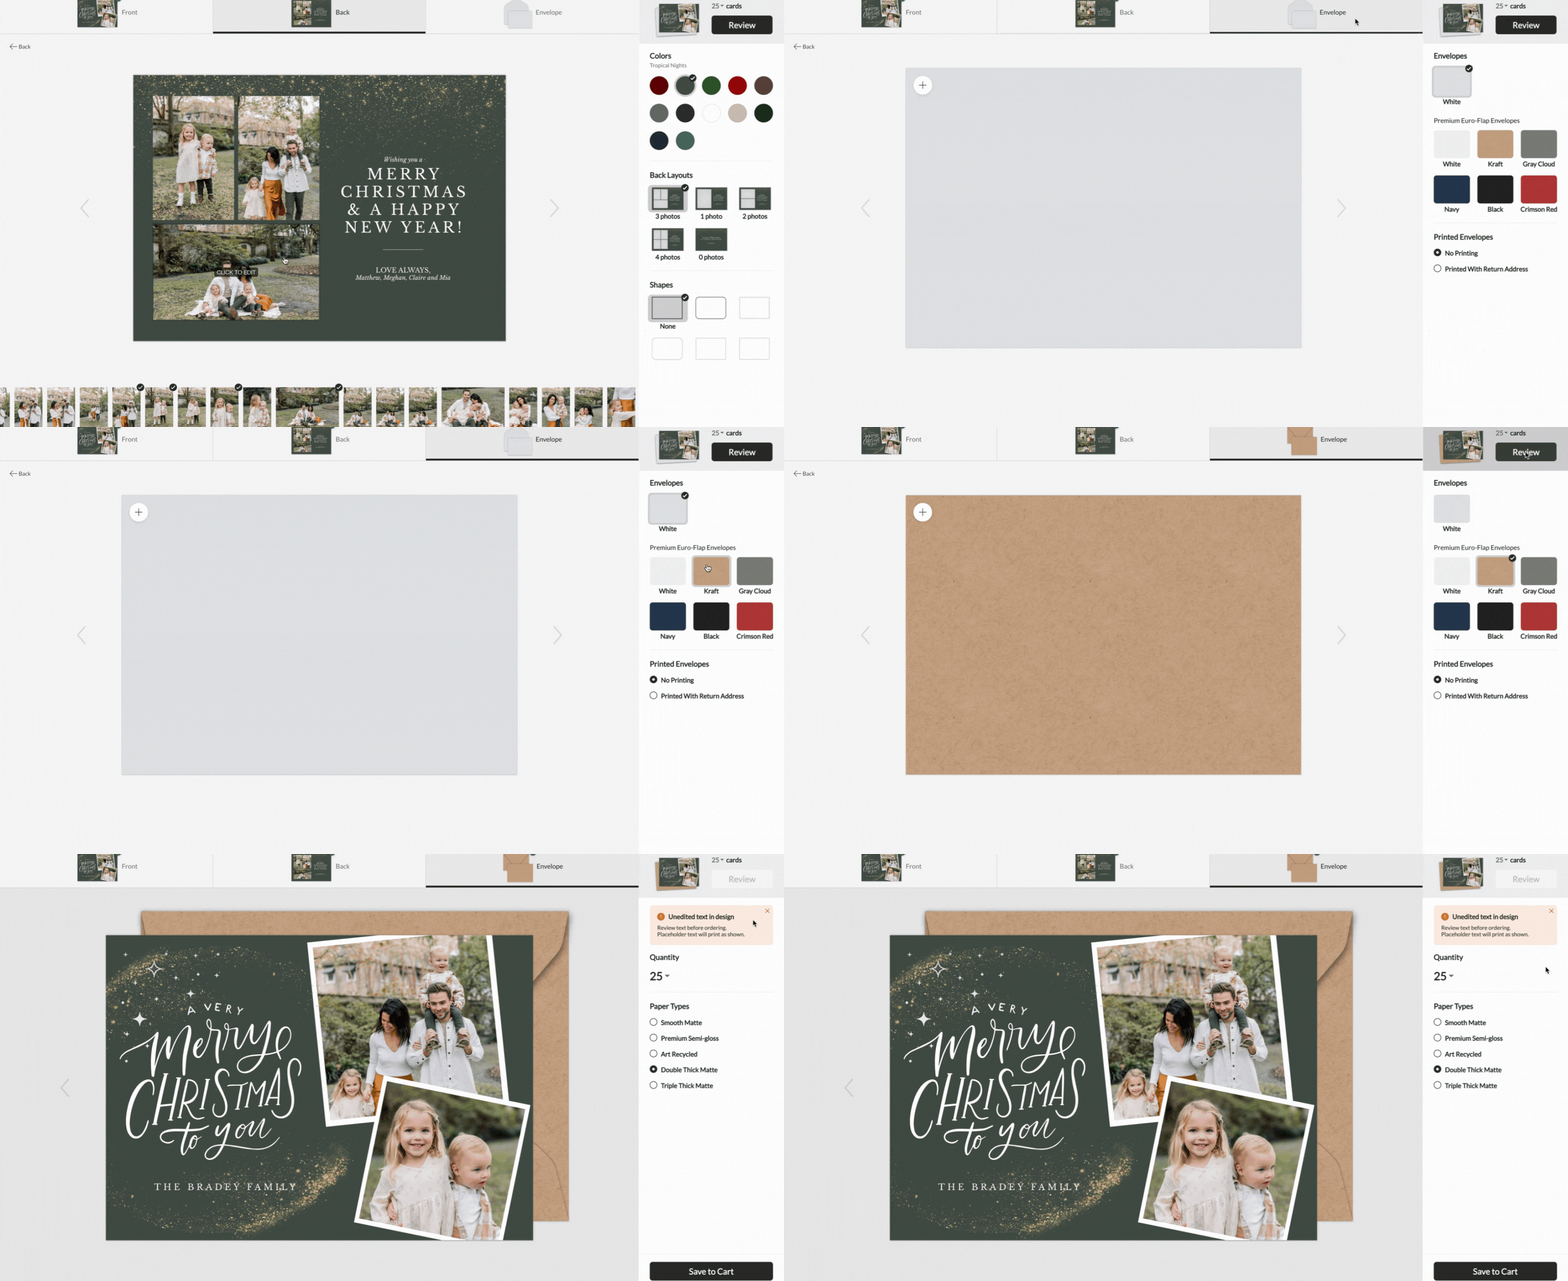
After you finalize your design and add your favorite photos from your session, you’ll be able to select a corresponding envelope to mail your holiday card in!
You’ll then be prompted to increase how many cards you’d like to send and update your holiday card’s paper option.
I’d love to help you create a meaningful holiday card to send! If you need help accessing your gallery or the holiday card builder, please don’t hesitate to email me!
LEAVE A COMMENT